
Integrating CI/CD and automating image deployment on AKS – Part 4
Finally we have reached towards the automating deployment of AKS. Yes, in this article we are going to configure and deploy CI/CD pipeline with Jenkins and automate securing docker image with ACR and deploying docker image to AKS.
To begin with this step, let’s understand first what we are planning to deploy and how the entire flow will look a like. To explain more in detail see the below image diagram to understand flow:
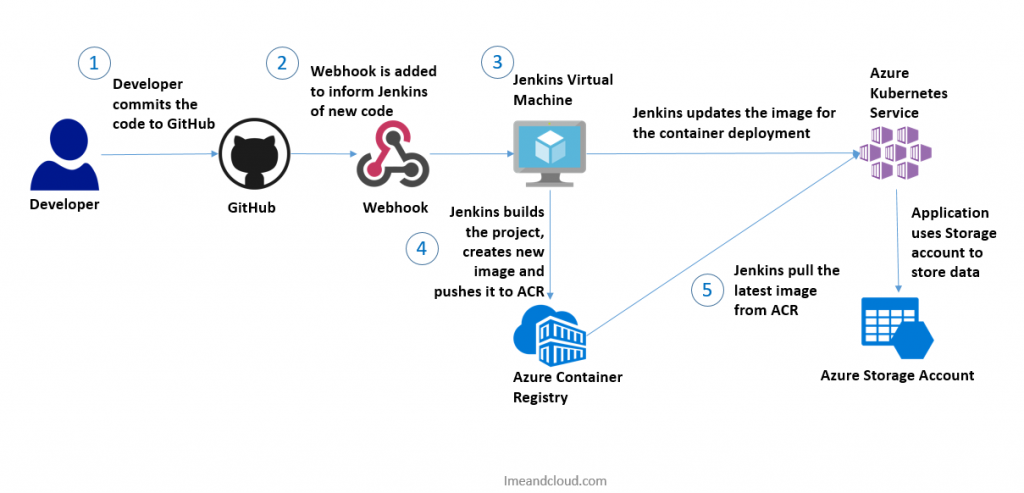
Step 1: Developer commits the code to GitHub
In this step we assumes that developer will commit the code to GitHub and publish the code repository
Step 2: Webhook is added to inform Jenkins of new code deployment
Webhook is added to inform Jenkins of new code deployment
Step 3: Jekins server trigger the job based on webhook input
Based on Webhook input Jenkins server triggers the job
Step 4: It will push the docker image to Azure ACR
It will create and push docker image into Azure Container Registry
Step 5: Jenkins pull the image from ACR and deploy it to AKS cluster
Once the docker image pushed into ACR, final step to push docker image to AKS cluster
Let’s get started with this entire architecture workflow and deploy AKS cluster with CI/CD pipeline. To begin with article, you need below tools and subscription required to complete this entire workflow:
- Setup local Git account to manage code repository: Git
- Crate Github account OR sign in if you have already
- You also need to setup Jenkins server during this exercise
Task 1: Commit application to GitHub
So first step towards configuring CI/CD, we are going to start with committing application code from locarl Git to remote Github account.
- To begin with check with your Git version installed on your machine and verify that latest version installed
git --version- The next step is to create remote repository, go to github.com and login into it, click on Create new Repo and give a name to your Repo >Create Repository
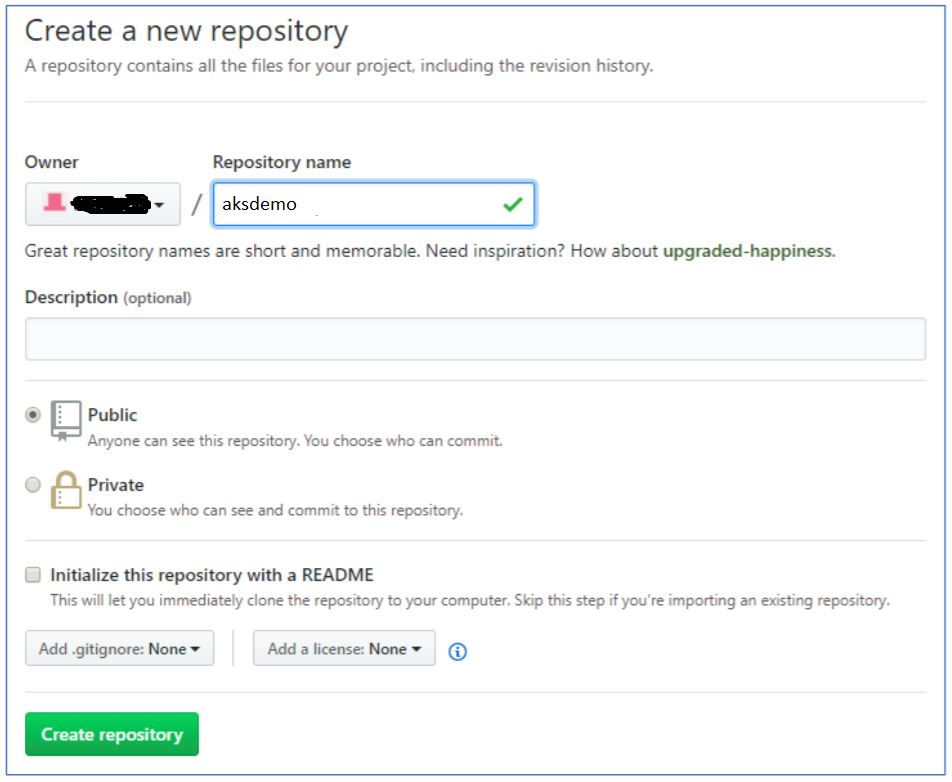
To publish your local git code to Github repository, follow below steps:
- Open Command prompt and navigate to your application folder. Run the following commands in sequence to add the application to your Github repo
git initgit addgit commit -m "first commit"git remote add origin https://github.com//.gitgit push -u origin masterSo all of the above commands are git command to initialize your local repo and commit your local application code to remote rep. Once the steps are over and successfully push your local code to Github, verify the same under your repository.
Task 2: Provision Jenkins and set it up CI/CD workflow
- To do that we are going use Azure Cloud Shell, go to Azure Portal and open Cloud Shell. Click on Create Storage Account if required.

- Once you connect with Azure Cloud Shell, run below command to connect with ACR
az aks get-credentials --resource-group aksdemorgp --name myAKSCluster- Now it’s time to setup Jenkins server for further process. Run the following commands to download the script .sh file to provision VM with Jenkins installed and have the AKS credentials copied. Use entire command in one line.
curl https://imeandcloud.blob.core.windows.net/simplifyingaks/deploy-jenkins-vm.sh > azure-jenkins.sh

sh azure-jenkins.sh
The above command starts provisioning Azure Virtual Machine with Jenkins set up on it.
- It will few take minutes to provision the Jenkins VM. Once provisioned instructions will be provided having the IP address and key to browse Jenkins and unlock it. Navigate to the IP address and enter the key to unlock it
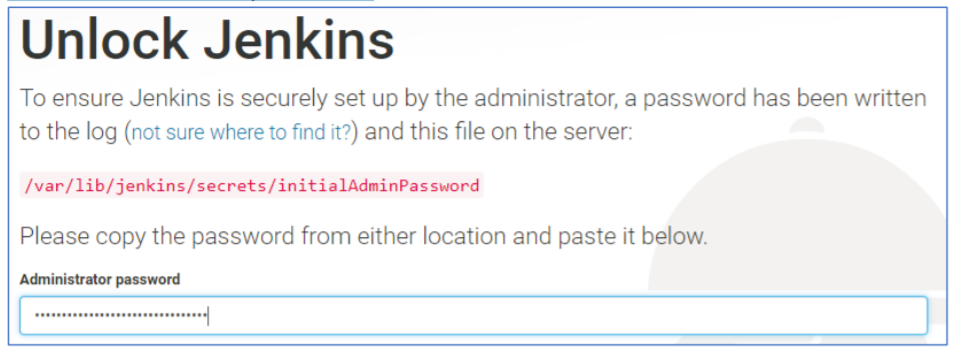
- Further you will be notified with Installed Suggested Plugins and setting up admin user account for the Jenkins server, and copy URL from the last screen
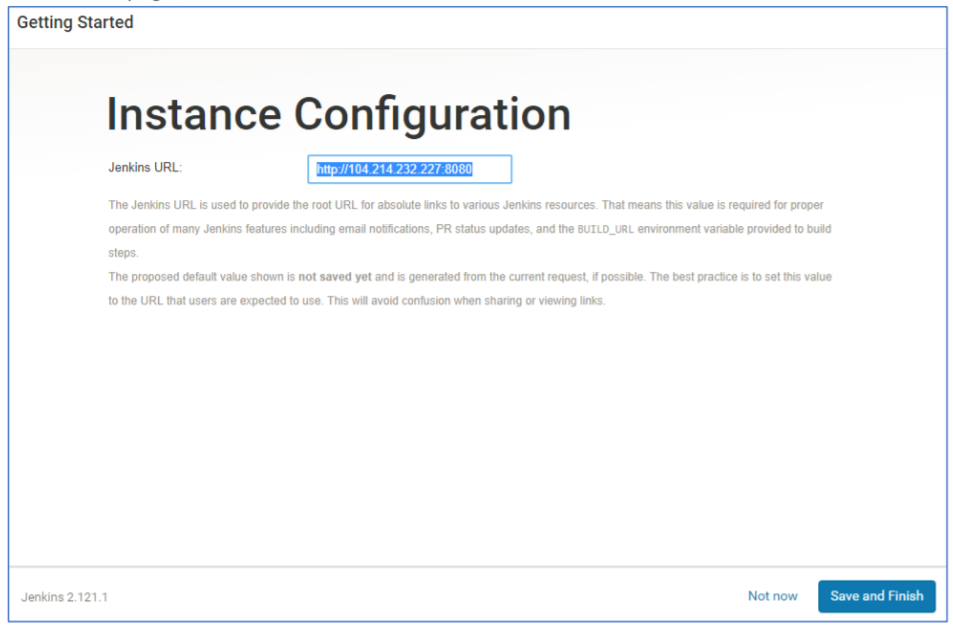
Once you are done with setting up Jenkins, the next step is towards configuring ACR credentials with Azure Active Directory.
Task 3: Add ACR Credentials
- To do that, you need to add ACR credentials from which the image needs to published to AKS. Open Azure Portal and navigate to your ACR service and click on Access control(IAM).
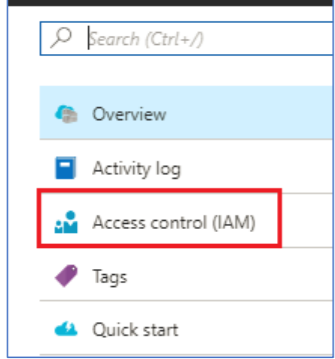
- Scroll to the bottom and note down the name of the app provided under Reader section
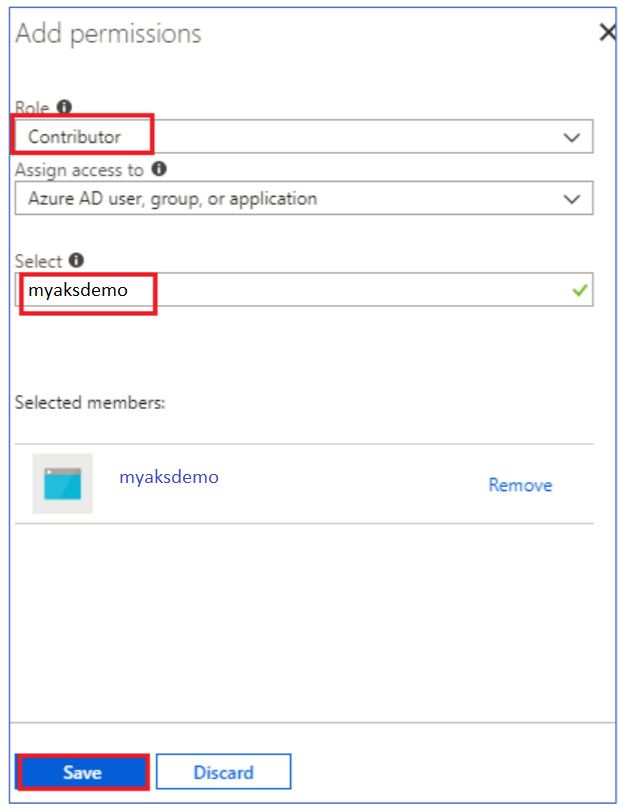
- Click on Add button to assign Contributor role and search for the app which was provided in the Reader section. Click on Save when done
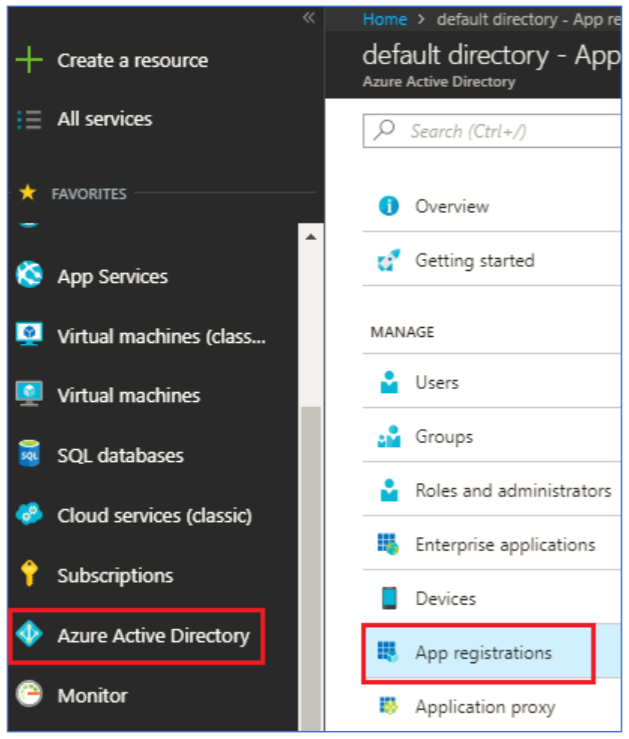
- Now it’s time to add application to Azure Active Directory, so go to your Active Directory in portal and click on App Registration
- Search for your app, once you get the application listed select the image and click on settings. From the application settings select Application ID
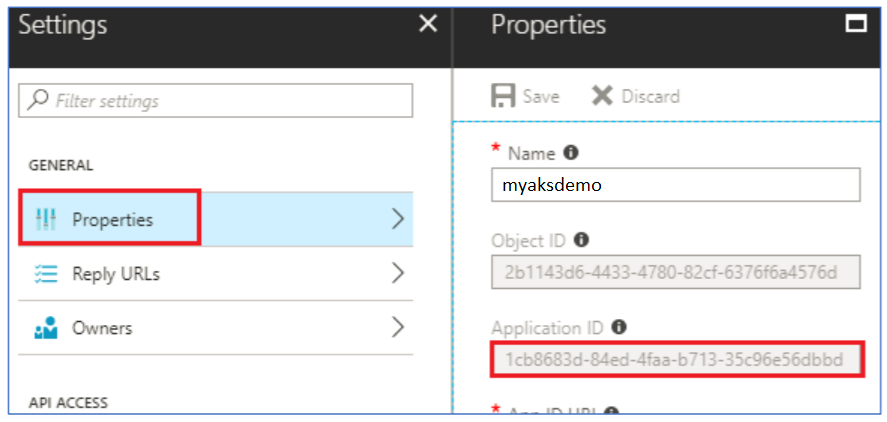
- Once you copy application ID, next step is to create Jenkins key to create and manage integration with ACR. Copy the key and store it somewhere locally, we need this key to add into Jenkins configuration

- Go back to Jenkins server and click on Manage Jenkins

- Under that tab click on Configure System

- Under Global Properties, select Environment variables, and add a variable with the name ACR_LOGINSERVER and a value of your ACR login server. Click on Save when done
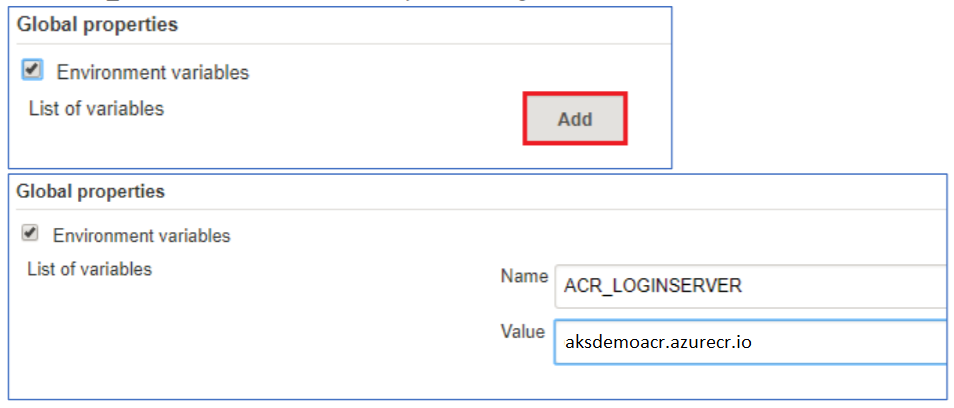
- Now go back to the Jenkins admin portal, click Credentials > Jenkins > Global credentials (unrestricted) > Add Credentials

- Select Username and password for kind. For Username, add the app Application ID copied in previous steps. For Password give the Key of the app copied in previous steps. For ID give acr-credentials. Click on OK when done

Task 4: Add GitHub Credentials
- In this task we are going to configure GitHub credentials to Jenkins, to do that go to GitHub and click on Settings
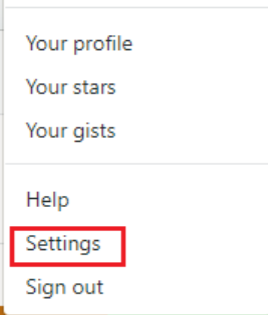
- Under Settings page, click on Developer Settings and click on Personal access tokens to Generate new token

- Provide a name for the token and select repo for Scope and click on Generate token when done

- Copy the generated token and save it for later using in Jenkins

- In Jenkins main page, click on Credentials > Jenkins > Global credentials (unrestricted) > Add Credentials

- Select Username with password for Kind. For Password add the generated token. For ID give githubtoken and click on OK when done

Task 5: Configure Maven
- Go to Jenkins Home page and then click on Manage Jenkins

- Click on Global Tool Configuration

- Scroll down to the bottom and click on Add Maven under Maven section

- Provide required details and then click on Save

Task 6: Creating Pipeline
So far we have configured Github and Maven under Jenkins, now it’s time to go ahead and create pipeline to automate this flow.
- To do that go back in Jenkins main page and click on New Item

- Give name as azure-empapp and select Freestyle Project and then click on OK

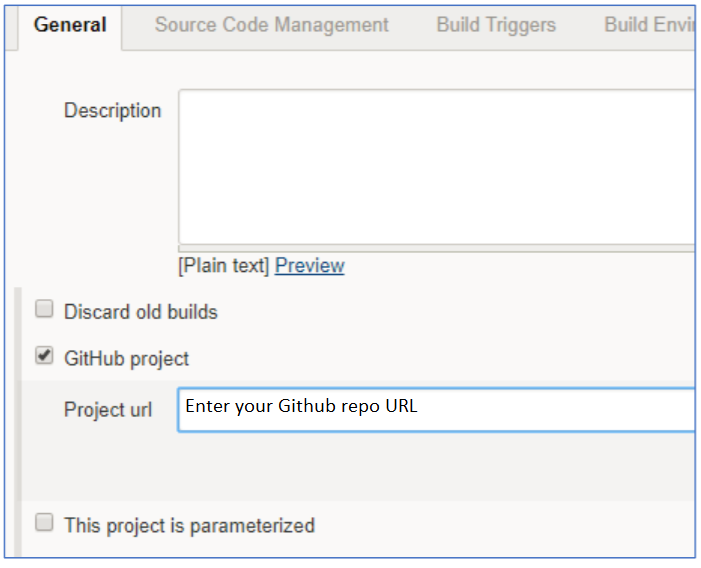
- Under General tab, select GitHub project and enter the URL to your fork of the application GitHub project
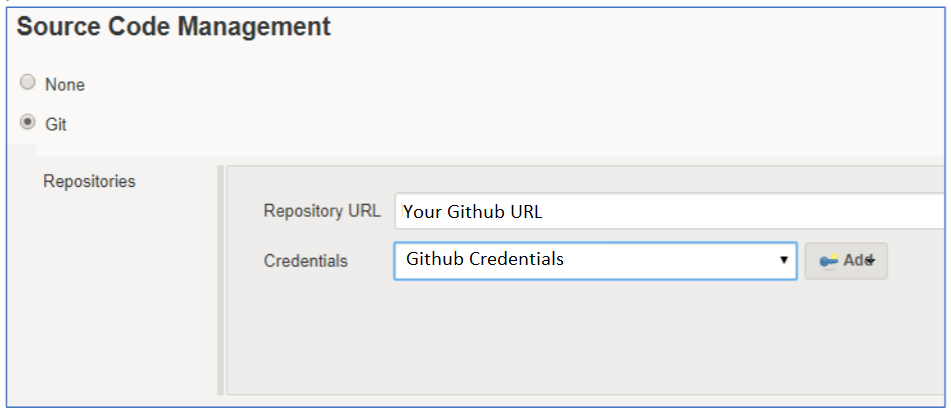
- For Source Code Management, select Git. For Repository URL, enter the URL to your fork of the application in GitHub. For Credentials, select the Git credentials which you created in previous tasks
- Under Build Triggers, select GitHub hook trigger for GITScm polling

- Under Build Environment, select Use secret texts or files. Under Bindings, select Add > Username and password (separated). Enter ACR_ID for the Username Variable, and ACR_PASSWORD for the Password Variable. Select the ARC Credentials added in previous tasks

- Under Build section, click on Add Build Step and select Invoke top-level Maven targets. Select the installation Maven created in previous task and for Goals enter clean install

- Add second Build Step of type Execute shell and use the following text. This script builds a new container image and pushes it to your ACR registry. Add the following code into it
# Build new image and push to ACR.

WEB_IMAGE_NAME="${ACR_LOGINSERVER}/empapp:kube${BUILD_NUMBER}"

docker build -t $WEB_IMAGE_NAME .

docker login ${ACR_LOGINSERVER} -u ${ACR_ID} -p ${ACR_PASSWORD}

docker push $WEB_IMAGE_NAME

- Add another Build Step of type Execute shell and use the following text. This script updates the Kubernetes deployment.
# Update kubernetes deployment with new image.
WEB_IMAGE_NAME="${ACR_LOGINSERVER}/empapp:kube${BUILD_NUMBER}" kubectl
set image deployment/azure-emp-java azure-emp-java=$WEB_IMAGE_NAME --
kubeconfig /var/lib/jenkins/config

- Once you are done with updating script, click on Save
Task 7: Test Build
In this task we are going to proceed further with build step. Click on Build now to test the pipeline and start a manual deployment
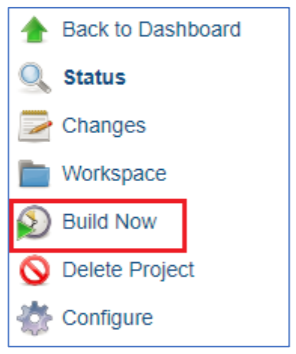
If everything configured properly then you should be able to view the AKS dashboard and check that new build is pushed and publish the application.
Task 8: Test CI/CD process by updating application
Now you have deployed complete application with Jenkins, let’s test the automated build process with new code commit in the GitHub project. For that we need to add Jenkins URL in our project settings to call it whenever there is a new code
- Go to your GitHub project and click on Settings

- Click on Integrations and Services

- Click on Add Services and search for Jenkins (GitHub plugin)


- For Jenkins hook URL give the URL of the Jenkins VM and add /github-webhook to it.

- Now test the CI/CD by making some changes to the application and committing it to GitHub. Change some content in WebContent-> listEmployee.jsp file, change the body h3 tag and commit it.
- Once you commit build the process and you will see the updated content will appear in your application
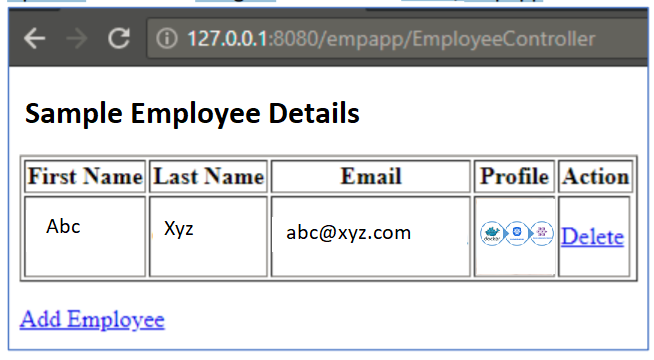
This is it!!!
I hope you were able to finish the overall steps and able to implement the AKS deployment with CI/CD pipeline building with Jenkins and other tools.
In my next article, I will be talking about Blue/Green deployment and how can we achieve it via Azure ARM Template and host the AKS services. Stay tuned and happy learning.


